
16. Quick Start Guide: How to configure Refund Protection
How to enable Refund Protection
Refund Protection is a feature that is enabled on a per-company basis. To set it up for a company, do the following:
Enabling the feature in Hub
In the hub, find the company you would like to enable the feature for and click “Edit Company”
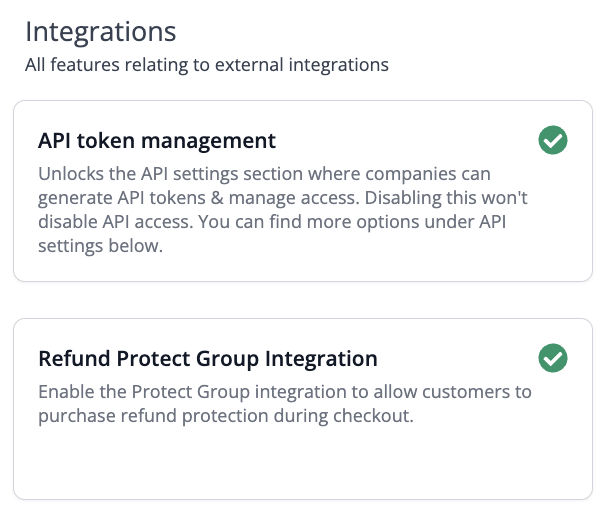
Scroll down to “Feature Settings > Integrations” and enable “Refund Protect Group Integration”
Settings Refund Protection Fees
This is the most important part of the process, as without this, none of the revenue for protection will be collected. To add the fee rate for Refund Protection, please do the following:
In the Hub, click on the company via “View Companies” for which you have enabled the feature
From here, click “Edit Fees” and add a new fee type for “Refund Protect fees”
Under the “Default” input, and add “100%” in the “%-based fees” input
Click “Apply” to save the changes, scroll down and click “Submit > Apply to all items”
Rinse and repeat the above for all enabled currencies on the given company
Enabling within Admin
Once the setting has been enabled in Hub, access the company in Admin and do the following:
In Admin, click “Settings > Protect Group Settings”
In here, enable the integration
After this, add the following the “Test vendor code” and “Live vendor code”
Then, add a “Contact email” for support, “Minimum order amount” and “Cut-off before the event”
Click submit to save the credentials
Note: To find the required vendor codes, refer to a company with Refund Protection enabled and copy from there, if applicable. If this is the first time you are enabling this feature, please reach out to you Nuweb CSM for these details.
Once the above is done, you can create a test basket on an event in the company to check that the Refund Protection widget is displayed as intended.
If the event you are testing with is more than 720 days in the future, or less than the number inputted in settings for “Cut off before event”, Refund Protection will show as unavailable.