
08. Quick Start Guide: Customising website text and emails
Many system emails are sent from your shop site, and all can be customised to add a personal touch. In addition to this, wording that appears across your shop site can also be customised to reflect your brand.
Site text and emails
To access these customisation options, please do the following:
1. In the left-hand menu, click "Website > Text Manager"
2. Here you will see a page with a text "Category" drop-down:

This drop-down allows you to select the text to customise from the following categories:
Legal - These are the default legal pages found in the platform. The pages that can be customised in this category are:
Cookies policy page
Gift aid declaration (only relevant to UK charities)
Deposit terms and conditions (Only relevant when using deposits)
Pages - These pages are found at the end of the customer journey once a ticket is purchased. The pages that can be customised are:
Order success page
Order download page
Emails - Each system email sent from the platform can be customised. There is a template for each email, which are as follows:
Order confirmation email
Deposit received email
payment failure email
Tax receipt email
Payment link email
Claim your items email
Customer refund email
Cancellation confirmation email
Password reset email
Complete your account email
Email verification notification
Item Approved email
Item rejected email
Reservation rejected email
Reservation confirmed email
Reservation approved email
Organiser purchase notification email
Event approval notification email
Global email text
Other - These are the other customisable areas of the system, which include:
Shop text
Shop buttons
Waiting room
How to customise site text and emails
Once you've settled on the part of the system you would like to customise, please do the following:
1. Select the wording to update from the drop-down menu
2. If you are editing an event-specific email, you can also select which events your changes apply to, using the "Event" drop-down
Note: By default, you will be adding custom text for all events unless otherwise stated
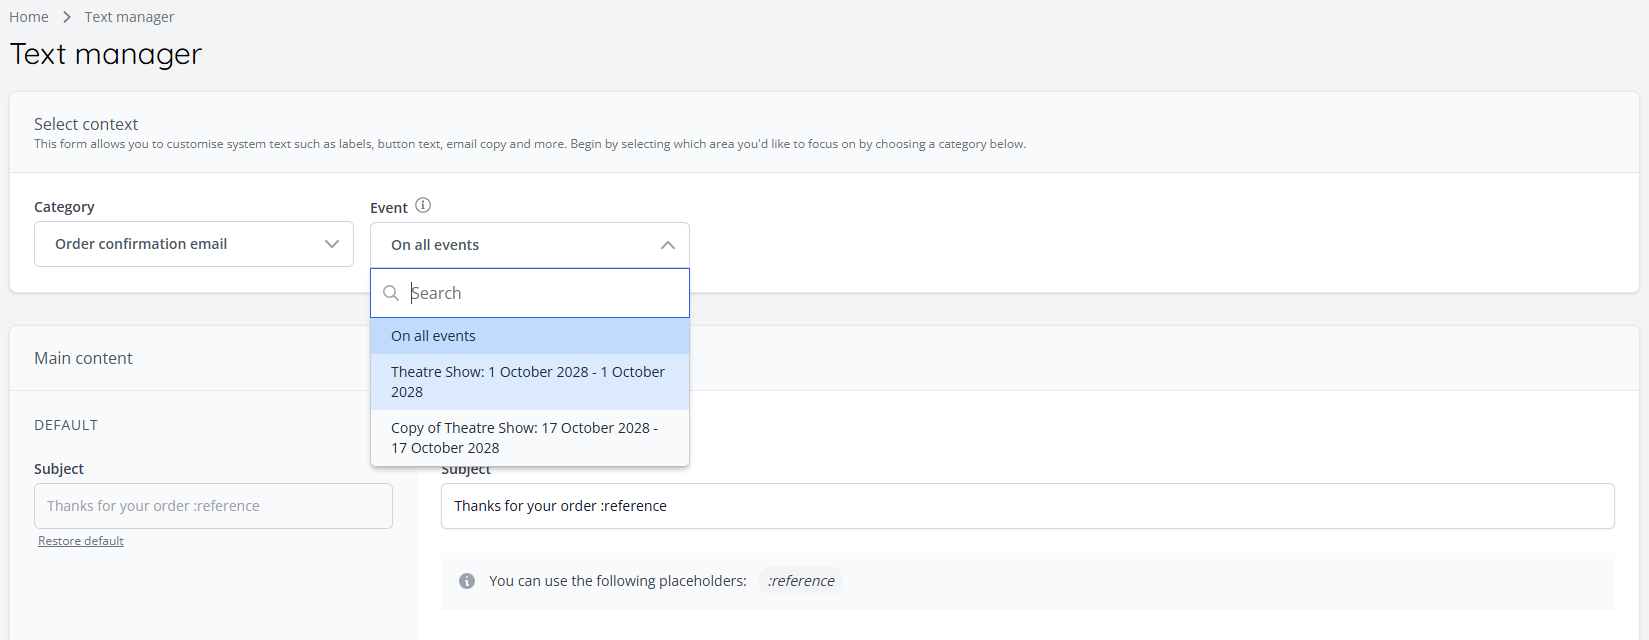
3. Once the template is selected, the new text can be added to the text inputs. To restore the original text, "Restore default" on the left-hand side can be clicked:

4. Once you have edited all of the content that you need to, scroll to the bottom of the page and click "Submit" to save your changes.
Note: It may take a few minutes for your changes to reflect on outgoing emails
Next Quick Guide: How to Configure Marketing Preferences