
13. Quick Start Guide: Refunding Orders
Once customers start purchasing tickets for your event, depending on your policies and procedures, customers might need to be refunded should their plans change or they find themselves in unforeseen circumstances.
How to refund an order
To refund an order in the platform, you need to do the following:
1. In the left-hand menu, click "Sales & Reporting > Orders"
2. On the orders page, open the filters on the left-hand side:
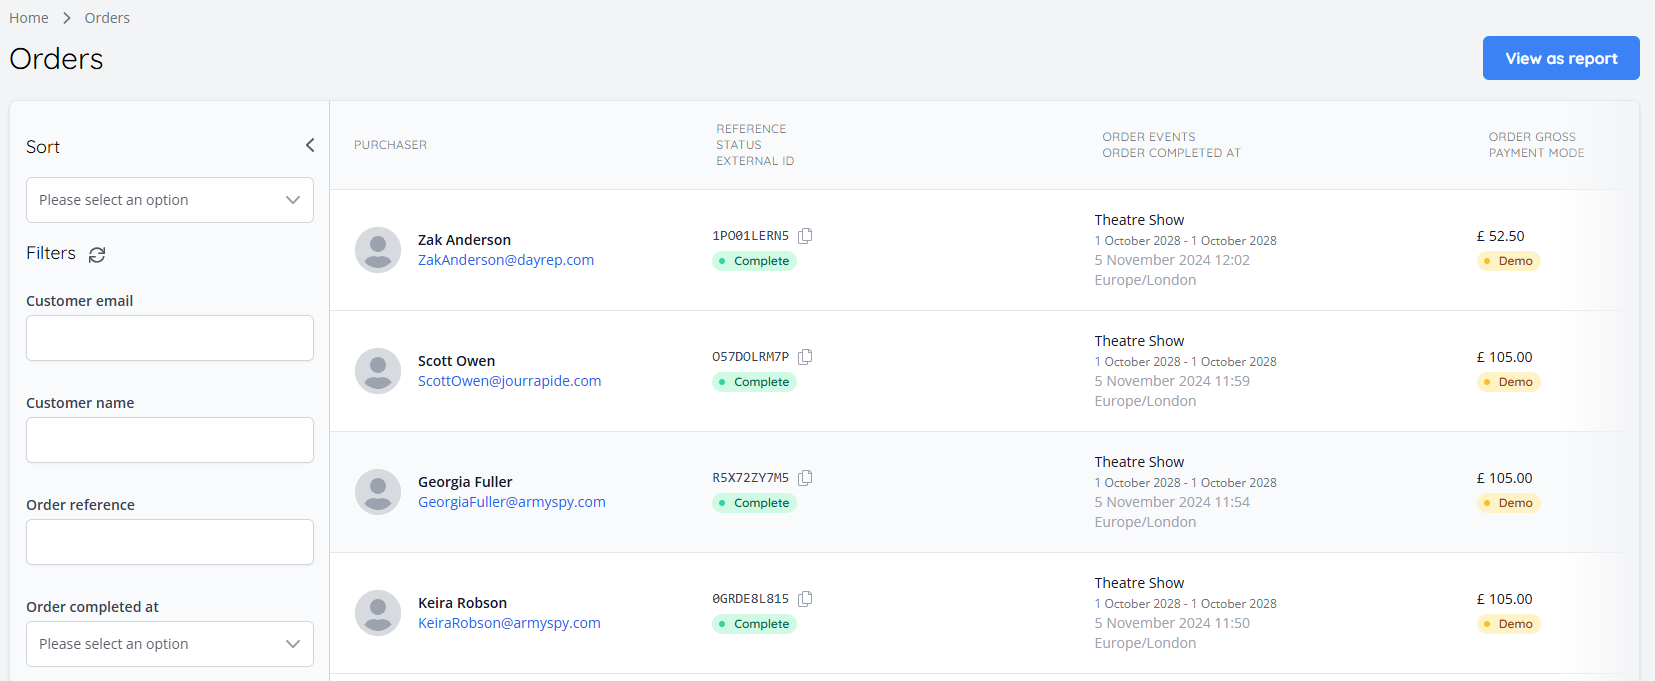
3. You can use these filters to find the customer's order. The three most common pieces of information to use to find orders are:
Customer email
Customer name
Order reference
4. Once you have found the correct customer's order, you can select it from the list
5. From here, on the right-hand side of the orders page, click the "Refund/cancel items"
6. This will open the refunds page. Here, the refund type can be selected from the following options:
Refund online - An online refund will cancel the items in this system as well as attempt to return the money to the customer via their original payment method
Refund offline - An offline refund will cancel the items in this system but no money will be returned to the customer
Cancel Items - This will mark all the selected items as cancelled, and not refund any money to the customer
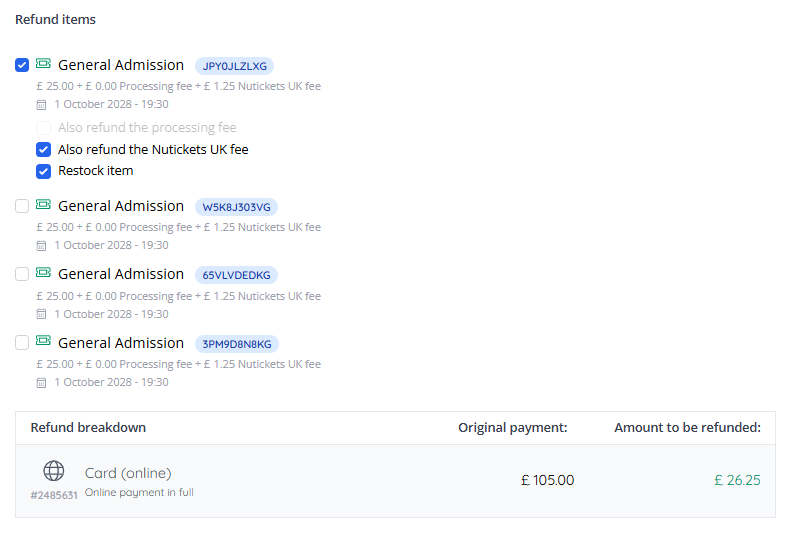
7. Once the preferred refund type has been selected, under "Refund items" the items that need to be refunded can be selected using the checkbox
8. Upon selecting the items eligible for refund, extra options will appear for each ticket, these are:
“Also refund the processing fee” - This will refund the processing fee on the ticket
“Also refund the 'Partner' (or reseller) fee” - This will refund the Partner fee back to the customer
“Restock Item” - This will restock the ticket so another customer can purchase it. This will always be selected by default
9. Below this, a refund reason can be added for audit purposes if necessary
10. You can then select whether or not the customer will receive the "Order cancelled" email or not using the "Send a notification to the customer" checkbox. Additional text can also be added using the free text input below the checkbox:

11. Once all refund preferences are set, you can then click "Refund" to complete the refund.
Next Quick Guide: Data Capture Question Responses